Getting started
Installation guide for Ubuntu operating systems. (Official React Native documentation)
Development environment
Install NodeJS
curl -fsSL https://deb.nodesource.com/setup_16.x | sudo -E bash -
sudo apt-get install -y nodejs
To check the version of Node installed, simply run node --version.
Once NodeJS is installed, npm is available. You can check its version with npm -version.
This project is based on Node version 16.x
Install Java 11
This project requires java 11. To check your java version, run the command java -version.
sudo apt install openjdk-11-jre-headless
Setting up the Android environment
The first step is to download Android Studio to manage SDKs and emulators.
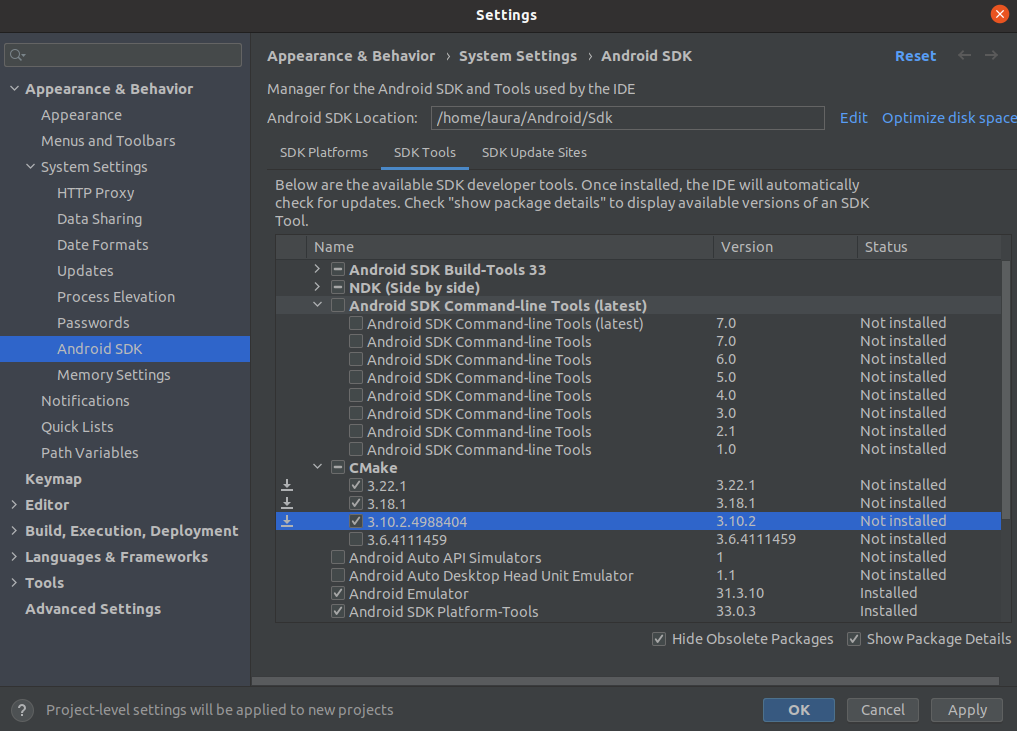
In the event of version problems, use Android Studio's SDK Manager to configure the various installed tools.
In the SDK Platforms tab, check that at least Android 10 is installed.
In the SDK Tools tab, check the "Show package details" box and verify that CMake versions 3.18.1 and 3.22.1 are installed. Android SDK versions must be at least 30 and 31, and Android Emulator and Android SDK Platform-Tools must also be installed.
Environment variables must then be set.
export ANDROID_SDK_ROOT=$HOME/<Path to Android folder>/Android/Sdk
export PATH=$PATH:$ANDROID_SDK_ROOT/emulator
export PATH=$PATH:$ANDROID_SDK_ROOT/platform-tools
To apply these changes, run the command source .bashrc. This updates the paths, and you can check that the process has worked with the command echo $ANDROID_SDK_ROOT.
The next step is to configure an emulator if necessary, using the Virtual Device Manager tool in Android Studio.
Application configuration
A quick configuration file app.config.js is available to easily define certain elements of the application.
The configurations taken into consideration are :
- testInstanceConfig: The test instance for automatically filling in the url, username and password fields of the login page in debug mode.
- releaseInstanceConfig: The instance configuration for release mode. This configuration automatically fills the url on the login page, but also hides the url input if the customer does not want users to be able to modify it.
- defaultLanguage: The default language for all users. This setting defines the application's default language. However, this value is overridden by the default user language set on the ERP. Default application language is English
- defaultRequestLimit: The default number of items retrieved per request. This value can be overridden on query entries if required. Its default value is 10.
- enableConnectionSessions: Enables or disables connection session management. If enabled, the user will be able to manage the sessions he wishes to store on his phone. If disabled, the application will only remember the last connection session.
- allowInternetConnectionBlock: Allows users to go offline by blocking the internet connection for requests.
- retrocompatibilityAOS6: Enables backward compatibility with AOS versions 6.4 & 6.5. If enabled, a router will test AOS v6 routes. If the resource is not found, the router will return the AOS v7 route for the request, otherwise the AOS v6 route will be used.
- versionCheckConfig: Enables version checking between the minimum required version defined on the web and the application version. If enabled, the user will be forced to update using the links provided, or by contacting the administrator if the versions do not match.
- showModulesSubtitle: Displays module subtitles in the menu.
- themeColorsConfig: Allows you to modify the application's classic theme by overriding the standard colors.
- writingStylesConfig: Allows you to modify writing themes by overriding the standard configuration.
- logoFile: Customize the logo displayed on the login page for customer projects.
An example configuration file is available on Github.
Start project
Add or remove a functionnal module for APK generation
Modules can be activated or deactivated directly from the App.js file in the src folder, or from the Axelor mobile settings configuration module in AOS available from version 7.0.0.
To manage modules directly from the Application component, simply add or remove a Module object from the modules attribute.
import React from 'react';
import {Application} from '@axelor/aos-mobile-core';
import {StockModule} from '@axelor/aos-mobile-stock';
import {ManufacturingModule} from '@axelor/aos-mobile-manufacturing';
import application_properties from '../package.json';
import {app_config} from './app.config';

const App = () => {
  return (
    <Application
      modules={[StockModule, ManufacturingModule]}
      mainMenu="auth_menu_user"
      version={application_properties.version}
      configuration={app_config}
    />
  );
};

export default App;
Important commands
- Install dependencies :
yarn clean && yarn - Build packages :
yarn build - Install debug android APK :
yarn android - Start Metro for development :
yarn start - Create release APK :
cd example/android && ./gradlew app:assembleRelease - Create release App bundle :
cd example/android && ./gradlew app:bundleRelease